When I was a kid, our church had a potluck lunch every Fifth Sunday (i.e., if a month had five Sundays, we at lunch together on the fifth one). Every family would bring a couple of dishes, and since there were a lot of good cooks in our church, we always had quite a spread. My favorite dish from those lunches was brown rice: white rice, onions and mushrooms cooked in beef consommé. Mmm. When I was home from my grandmother’s funeral last fall, I hid out in the kitchen with some of the ladies from church and ate brown rice out of the casserole dish with them as we cleaned up.

It wasn’t until high school or college that I realized that there was actually a type of rice called brown rice. The first time I tried it I really did not like it – so dry and bland compared to what I had grown up thinking brown rice was. However, once John was on a gluten free diet I became worried about whether he was getting enough fiber and I started cooking brown rice instead of white. Over time our palettes adjusted and now we love the stuff! Especially with tamari. *
We’ve been making brown rice so frequently that we bought a rice cooker off of Ebay. While it does make a big pot of rice, we have to watch it closely and the results are not consistent. So tonight I did some research to see if I could find a way to make a really good pot of rice on the stove-top.
It turns out that there are four major variables in brown rice recipes.
- Water to rice ratio: I saw recipes that called for as little as 1.5 cups of water for each cup rice, and as much as 2 cups of water for every cup of rice.
- Cooking time: One of the recipes that I tried tonight called for only 20 minutes of cooking time. Others that I looked at said the cooking time could be one to two hours/!
- Precooking preparations: Some recipes instruct you to soak the brown rice for an hour before cooking. A few recipes that I found had you toast the rice in oil before cooking the rice in water.
- How to combine the rice and water: Most recipes instructed you to combine the rice and water and then heat to boiling. The recipes in which you toast the rice beforehand have you boil water in a teapot, and then add the boiling water to the rice.
The Contenders
1. The recipes that I selected for tonights experiments are all very different. Steve Pavlina’s recipe for brown rice uses a 1.5:1 water to rice ratio, a very short cooking time, and no precooking preparation.
2. Just Hungry has a instructional post on how to cook Japanese rice in a cast-iron pot. This recipe called for a 1.5:1 up to 1.8: 1 water to rice ratio; a cooking time of at least an hour; and, a precooking soak of at least one hour. Needless to say, since we were incredibly hungry I altered this recipe a bit which may be why the results were less than spectacular. I used the 1.5:1 ration, but skipped the pre-soak. I also toasted the rice in oil and then added boiling water before cooking for a rather brief 40 minutes. Now that I’m writing it out, I really didn’t follow her recipe that well all all =)
3. The third recipe is my usual method of cooking brown rice. I really thought that it had no chance of winning, but included it as a control.
The Results
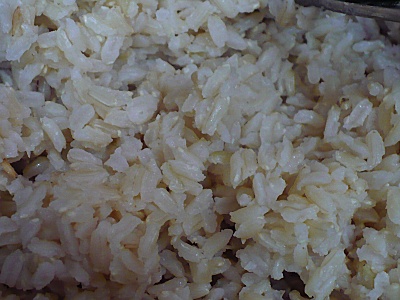
I was skeptical about Steve’s recipe. Although he’s been cooking brown rice this way for 10 years, I thought that the 1.5:1 ratio would be too low and that the 20 minute cooking time would be too short. He does state in his post that he likes his brown rice on the chewy side and that’s exactly how it turned out. The rice grains were almost al dente, but not undercooked. The grains tended to stay separated rather than sticking together which could be good or bad depending on how you want to use the rice. A bit of water was still in the pot when I took it off of the heat, but most of that had been absorbed by the time I removed the cover.
Grade: A- This is a solid recipe, and great if you need brown rice quickly. Total “to the table time” was 30 minutes. I like my rice a bit more chewy, so this would not be my first choice if time was not a factor.
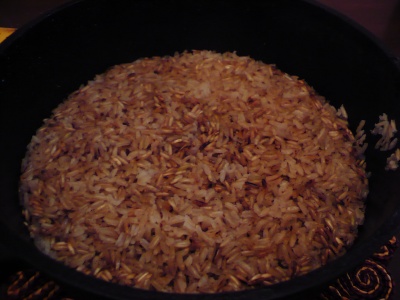
The rice that I cooked in my cast-iron casserole was definitely the one that we were the most anxious to see. When I added the boiling water to the toasted rice the water made a loud hissing noise, steamed up the entire kitchen, and boiled as hard as I have ever seen water boil. So hard that I was afraid it was going to lift the cast-iron top off of the pot! I think that a lot of the water evaporated at that point, and I really expected to have a pot of burnt rice. Fifty minutes later John removed the top and we both said “Burnt!” at the same time. After I fluffed the rice we realized that it wasn’t really burnt; it was just a lot darker than the other rice because I had toasted it first. The rice was well cooked, but on the dry side. The grains were completely separated and reminded me of the rice at our local Mexican place. Toasting the rice grains gave this batch a distinctly nutty taste, which I enjoyed.
Grade: C- mainly due to my experimentation. However, I liked it enough that I’m sure I will be experimenting with this cooking method in the future.
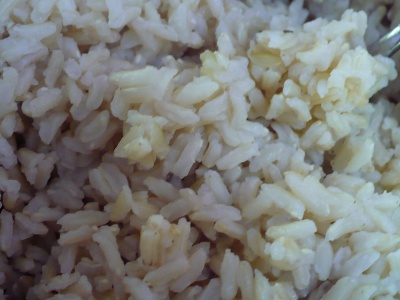
I was very surprised that I liked my recipe this best. I really didn’t expect too, and am slightly embarrassed that it turned out this way. The main difference in my recipe is that I place couple of layers of paper towel over the pot before I cover it. The paper towels help to absorb some of the moisture so that the finished product is not watery. My rice was more chewy than Steve’s due to the longer cooking time, and it was more sticky, which I think was due to the extra water.
Grade: A This rice takes longer to cook – probably 45 minutes from start to finish, but I really like the chewiness and slight stickiness. My recipe is below if you’d like to give it a try.
Naturally Gluten Free Brown Rice
Yield: 7 – 8 cups
- 2 c. brown rice
- 4 c. water
- Add the brown rice and water to a large pot, and bring to a boil over high heat.
- As soon as the water begins to boil, turn the heat to low. Place two layers of paper towel over the pot, and then cover with a lid.
- Simmer at low for 40 minutes, then remove from the heat. Fluff the rice with a fork and serve.
So I am interested in this Tamari……. it is gluten free soy sauce?
sharondelray@comcast.net
Hi Sharon,
Tamari is a type of Japanese soy sauce that is made without wheat. Many types of soy sauce use roasted what as a main ingredient, but tamari is traditionally made from water, soybeans, koji (a type of mold used to ferment soybeans) and sea salt. It is less salty than the soy sauce found in most American grocery stores and has a slightly different flavor, which we love.
I wish I had discovered your website before I, too, went on my “brown rice experiments”.
Just like you, I had used Steve Pavlina’s recipe and found it way too chewy. My second attempt was to soak the rice overnight, drain it, toast it to evaporate the water, then added water. That was too wet.
Tonight, I finally said, Screw it. I made it just like I would white rice (2:1), except I let it cook about 45 minutes. Didn’t lift the lid for at least 15 minutes afterward, and it was perfect (for me).
Hi! Just wanted to chime in on the tamari question- tamari was traditionally made without wheat but now is not necessarily made wheat-free, especially in Japan. All the mainstream brands of tamari in Japan that I found contained wheat. San-j has a true wheat-free tamari, but you will want to read the labels carefully.
Brown rice is good stuff! I’ve made Steve’s recipe, too. 🙂
-Sea
I’ve been cooking my brown rice your preferred way for years and haven’t found a better way yet. I cook my rice for 45 minutes and have never had water left in the pan. I use a special heavy nonstick pan that I bought just for cooking brown rice and steel-cut oatmeal so it doesn’t stick or burn to the bottom of the pan. Unless I’m using the rice for other recipes like rice pudding, I add diced carrots and onions, sometimes fresh parsley if I have it, and substitute Trader Joe’s organic fat-free low sodium chicken broth for half the water. I add this rice mixture to the only canned soups that I ever use – Progresso Lentil and Progresso Hearty Tomato. I also freeze individual portions using the old Tupperware containers used for making hamburger patties. I spray the container with oil, then fill it with 1/2 cup rice, smoosh it down compactly, then eject onto a lightly sprayed tray which holds about 5 rice patties. When frozen, I place them in plastic bags and remove one at a time when I need a serving of rice. They look like rice cakes when frozen and store easily in a large plastic bag or container. I have seen some of the other methods for cooking brown rice and was going to experiment – thanks for doing it for me 🙂
I’ve had really good luck cooking brown rice using Steve’s method. Slightly chewy and nicely separated grains. I think the trick is using the right type of pot. I use a Cuisinart that has a really heavy lid so that too much steam doesn’t escape while cooking. I’m sure if I used a lighter pot/lid, I’d need to use a little more water.
Your recipe also sounds great and I’ll be sure to try it soon when I have a bit more time!
Pingback: Cheap is Delicious « Gluten-Free Maui