You’re receiving this email because you signed up for Gluten Free Cooking Schools free newsletter  at www.glutenfreecookingschool.com. If you don’t want to get any more emails, just click here.
Todays kicks off the Gluten Free Cooking School “Bake Gluten Free Challenge.” Over the next six days I will send you three new gluten free recipes – each paired with an explanatory article. Â Cook one of these recipes and send me a picture and short email telling me about it (by midnight PST May 7th), and you’ll be entered into the Bake Gluten Free Challenge drawing.
The winner will receive all 15 of our virtual gluten free cooking classes! Â The classes at Gluten Free Cooking School have been closed to new students for several months. Â But, we’re re-opening the classes to new students on May 1st! Â More information to come on that =)
I recently got an email from a reader who said that pizza was her bugaboo. She could bake gluten free bread and cookies, but pizza was the sticking point. That email inspired the following article.
In the next email I’ll give you the simplest gluten free pizza recipe you’ll ever see. (By the way, it’s also corn free, rice free, yeast free, sugar free, and casein free!)
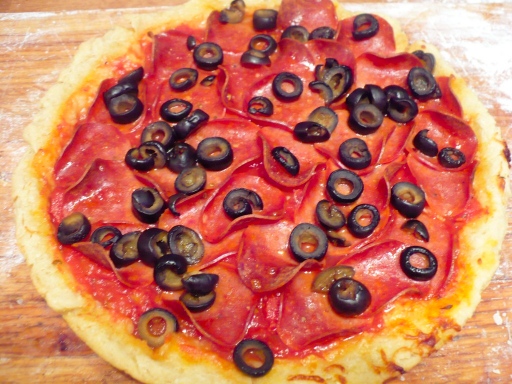
Q: Is delicious gluten free pizza possible?
A: Absolutely. If you don’t believe me, show up at our house any Saturday night. Chances are we’ll be serving pizza – glorious gluten free pizza!  We make St. Louis Thin – Style pizzas, Chicago style  deep-dish pizzas, and everything in between.
Q: Is it hard to make gluten free pizza?
A: No, it’s not! I know it may be difficult to believe since you’ve probably never come across a good store-bought frozen crust.
Pizza restaurants would like you to think that it’s hard! Many are starting to offer gluten free pizzas, and charge upwards of $25 for a 12″ pizza with two toppings (Even though they bought the crust pre-made) You can do much, much better at home in the taste and price categories. Trust me =)
Q: What goes into a gluten free pizza crust?
A: If you pare a pizza recipe down to the essential basics, you really only need flour, water, oil and salt.
Yeast, sugar and spices, while nice, are really just decoration. If you can eat them, that’s wonderful. But, you don’t have to give up pizza just because you can’t have yeast and sugar.
Likewise, xanthan gum and guar gum are not essential. I like to use them, but I make good pizza without them too.
Q:Â Do you have any guidelines for ingredient substitutions in recipes for those of us with multiple food-intolerances.
A: I’m so glad you asked, because I do! Let’s take a closer looks at the ratio of ingredients in pizza. Ratios provide a new way of looking at a recipe and are really helpful when you’re trying to understand a recipe and make substitutions.
Remember that pizza is really just flour and water, with a little added salt and oil.Depending on the flour mix that you use and whether you include xanthan or guar gum, the flour to water ratio for pizza will generally be somewhere between:
3 parts flour: 2 parts water (e.g 12 oz. flour: 8 oz. water), or
3 parts flour: 3 parts water (e.g. 12 oz. flour and 12 oz. water).
The amount of xanthan or guar gum (optional), oil and salt will all depend on how much flour you use and personal preference.
Here’s an example of how that works in real life: I have a 12″ pizza stone (it’s all that will fit in our tiny, tiny oven), so we always make two 12″ pizzas. By trial and error I’ve found that 12 ounces of flour will make the right amount of dough, so I start by measuring 12 oz. of flour into a mixing bowl.Next I add the ingredients that are strictly personal preference: salt (2 tsp), oil (2 Tbsp), and xanthan gum (1 Tbsp). Those amounts are not set in stone – they’re just what I like.
Now, I’m ready for the most crucial step – adding the water. If I’m using a flour mix that I’m not familiar with, or if I’ve left out or changed an ingredient (like xanthan or guar gum) that affects the amount of water that will be absorbed, then I ONLY ADD HALF THE WATER. That’s right. I start with just half because I’m not sure of what the flour to water ratio will be. So, in this example I would add 6 oz of water.
After adding half the water I mix up the dough and see what it looks like. If it’s dry and crumbly, then I ADD A LITTLE BIT MORE WATER. I add water one ounce at a time, mixing the dough after each addition, until the dough is the proper consistency. And then, if I’m really on top of things I make a note of how much water I added and jot down the flour:water ratio for making pizza with that flour.
So, to sum it up, start with a flour mix that meets your dietary needs, then add water, salt, and oil and you’ll have a great pizza. If you want, you can also add a binding agent (like xanthan gum or guar gum) and a leavening agent (like yeast, baking powder, or baking soda).
Q: That’s all well and good, but what should gluten free pizza dough feel/look like?
A: That’s a good question, because often gluten free doughs do not look like their wheat equivalents. In this case, the consistency of the dough will depend on what type of pizza you’re making. If you’re going for a thin/regular crust, then the dough should be smooth, pliable and kneadable. It may be a bit tacky, but it should be easy to pat or roll out.
The consistency of a Chicago-style thick crust pizza is very wet and sticky. It’s still rollable, but you have to take extra precautions or you’ll end up in tears and with dough all over everything. (No need to ask….anytime I make a statement like that, it IS because I’ve done it!)
Clear as mud? Â If you take the Gluten Free Pizza class you’ll be able to see me mix up each kind of dough (and roll out the crusts) and you can see what the dough looks like in the bowl and how it handles as I make the crusts. That class also includes the recipes for GF St. Louis Thin-Style and GF Chicago Deep Dish crusts (along with a few more!)