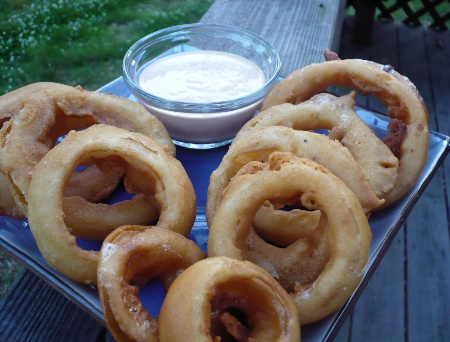
Vidalia onions may be the most famous crop of the state of Georgia. Mild and sweet, these onions are one of the treasures of spring. And in our house, the advent of the Vidalias can mean only one thing – gluten free fried onion rings.
I’ve adapted this batter recipe from Joy of Cooking and the name reflects the changes I’ve made. We’ve been making gluten free fried onion rings for over a year, and I didn’t actually read the recipe instructions until last week. Who knew that you’re supposed to let the batter rest for 3 to 12 hours. I’m lucky if it rests 3 to 12 minutes. No worries though, despite my shortcuts (and there are more!) this recipe turns out mouthwatering onion rings. If you’ve been missing Bloomin’ Onions, you’re going to have a mighty fine weekend with these =)
P.S. Be sure to scroll all the way down. I’ve include my recipe for the dipping sauce too~
Instructions
- 1 large Vidalia onion –
- equal parts milk* and water – enough to mostly cover the onions
- 1 1/2 c. brown rice flour
- 1 tsp. salt
- 1/8 tsp. black pepper (ground)
- 1 Tbsp. canola oil
- 2 eggs, beaten
- 3/4 c. Redbridge gluten free beer
* I use soy milk, but you can use whatever “milk” works with your diet.
- Slice the Vidalia onion into rings that are approximately 1/4 inch wide.
- Soak the onions in a mixture of milk and water for about an hour.
- Meanwhile, mix all of the batter ingredients together in a large bowl and let the batter rest in the refrigerator until you need it.
- When then onions are almost done soaking, start heating your oil. (I use my largest cast-iron skillet on medium heat with about an inch of canola oil. If you’re tempted to use less, don’t. The onion rings need to have enough oil that they can swim around in it.) You can test to see if the oil is hot enough by sticking the end of a wooden spoon or skewer into the oil. If the oil starts bubbling around then wood then you’re good to go.
- Drain the onions and then dip one ring into the batter. Once that’s done, gently lower the onion ring into the hot oil. Repeat that process until your skillet is full.
- The cooking time for the onion rings will depend on the temperature of the oil, so stand by until you get a feel for it. I generally check the underside after 3 to 4 minutes. If it’s turned a light golden color, then it’s time to flip. If not, let it cook another minute or so. Once you’ve flipped all of the rings, they will need to cook on that side for approximately the same amount of time, maybe a little less. If you’re standing there watching it, I don’t think that you’ll go wrong.
- Once the rings are done, remove each one from the oil and let as much oil as possible drip back into the skillet. Then place the onion ring on a towel covered plate and sprinkle with a small amount of salt. Repeat from step 5 until all of the onion rings have been cooked.
I do realize that was a really long set of instructions. Can you imagine how long it would take if I hadn’t left out the parts about letting the beer go flat and whipping the egg whites separately to fold in at the end! I’m so glad I didn’t read those instruction last year =)
Creamy Wasabi Dipping Sauce
- 1/4 cup mayonnaise or Vegannaise
- 1/4 cup sour cream or plain yogurt
- 2 heaping tsp.ketchup
- 1 heaping tsp. tomato paste
- 1 tsp Wasabi paste
- salt, black pepper, and cayenne pepper to taste
Mix all ingredients thoroughly and dip away. I know your stuffed now, but here are more recipes for amazingly binge-worth Gluten Free Snacks.
Wow, those look sooooo good! I have to find some GF beer locally first so I can try them. I once made a bloomin’ onion (before the celiac diagnosis) and did everything according to the directions but the batter just wouldn’t stay on. It was quite disappointing after going through all the steps and time it took. I hope I can get my battered rings to look as good as yours.
you rock! Almost nothing I love more than fried onions, mmm… sad because I have them something like once every two years. lol. (I’m lazy and also have trouble justifying the deep fryer!) But now you’ve done it… I’ll have to try these. 🙂
-sea
thanks for this! i always wanted to do this without a deep fryer. i love this site!!
Oh my, my husband will LOVE these! They look amazing!
Karen
http://glutenfrefoodreviews.com
Sea, I don’t see much point in a deep fryer either. I’m pretty sure I’ve fried onion rings in my pressure cooker before =)
That is funny Mary Frances, I thought I was the only one who deep fried in my pressure cooker!